DIY Car Detailing: How to Achieve Professional Results at Home
Discover easy DIY car detailing tips to achieve professional-quality results at home. Learn step-by-step techniques for a showroom finish.
Car cleaning is usually full of costly services and state of the art tools; nevertheless, many professionals can give a brilliant result inside the garage. Most auto car detailing procedures can be done personally and at a cheaper price hence why you should try doing it yourself and be proud of your achievement. In this tutorial, you will learn how to clean, dry, maintain the interior and apply the last touches and achieve professional-looking results at home.
1. Gather Your Supplies
Make sure you have everything you need before you begin. High-quality supplies and equipment will make a big impact on the outcome. Below is a list of essential items:
-
Car wash soap: This is specifically made for automobiles, not a dish soap for the home.
-
Microfiber wash mitts: Both are efficient at removing dirt and are good for paint too.
-
Buckets: one for washing and the other for soap and water.
-
Car drying towels: Microfiber or waffle weave towels won't scratch surfaces.
-
Clay bar kit: To clean impurities from the painted surface.
-
Polish and wax: To protect the paint and restore its shine.
-
Interior cleaner: safe for a variety of surfaces, including leather, plastic, and fabric.
-
Detailing brushes: For cleaning vents and other difficult-to-reach areas.
-
Vacuum cleaner: To clean inside seats and carpet.
2. Wash Your Car
A good thing is to wash thoroughly. For efficient washing, follow the following guidelines:
-
Pre-Rinse: Use a pressure washer or hose to clean off any dust and debris that may have settled on the surface of your car.
-
Two-Bucket Method: Fill one bucket with clean water and the other with soapy water. Using this technique prevents dirt from reaccumulating on the automobile. After dipping your wash mitt in the sudsy water and cleaning a section of the car, rinse it in fresh water and dip it again.
-
Top to Bottom: Wash your car from top to bottom as soon as dust and grime settle to the lowest parts of the car.
-
Rinse Thoroughly: Make sure you rinse the soap off thoroughly to avoid leaving any residue that could cause damage or staining.
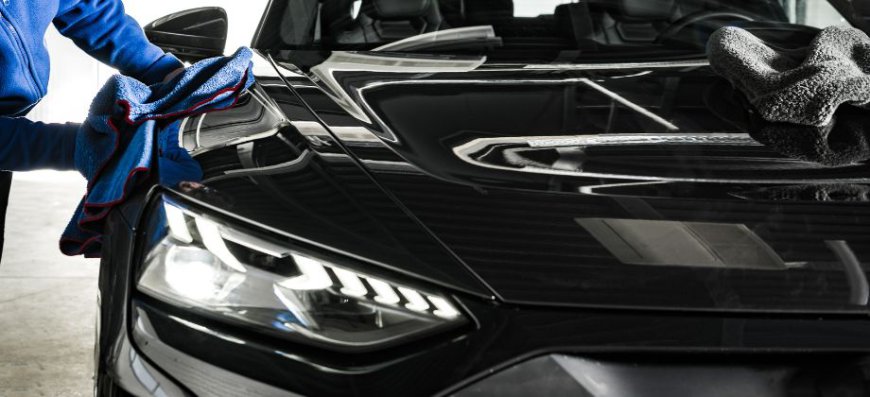
3. Dry Your Car
Proper drying prevents water spots and streaks.
-
Use a Quality Towel: Dry your car gently with a microfiber cloth. Avoid rubbing, as this can cause scratches.
-
Dry in Sections: To guarantee complete drying and to prevent water from disappearing and leaving stains, work in small sections.
4. Clay Bar Treatment
Contaminants that are not removed by washing alone are removed using a clay bar.
-
Lubricate the Surface: Spray detailing spray or clay lubricant on a small section of the automobile.
-
Clay the Surface: Rub the clay strip carefully over the greasy area. You will feel the clay stretch as it absorbs the contaminants. To get a clean surface, turn and knead the clay occasionally.
-
Wipe-Off Residues: After claying, use a fresh microfiber cloth to clean the area.
5. Polish Your Car
Polishing adds shine and removes minor scratches.
-
Apply Polish: Apply a small amount of polish to the surface with a dual-action polisher or foam applicator pad. Use a crosshatch pattern to apply evenly.
-
Buff Off: After polishing, rub off any remaining residue with a fresh microfiber cloth to achieve a shiny finish.
6. Wax Your Car
Wax enhances the car's shine and adds a layer of protection.
-
Apply Wax: Polish the surface using wax with a polisher or use a foam applicator pad with the wax. Take time on working the sections to ensure on the drying time of the used material.
-
Buff the Wax: After the wax has dried, take another clean and dry microfiber cloth and rub over it in circular motion in order to create a perfect glossy surface.
7. Interior Detailing
Your car's interior needs maintenance too.
-
Vacuum: Vacuum the floor mats, seats, and carpets first. To reach inside crevices and under seats, use a variety of accessories.
-
Clean Surfaces: Use the appropriate interior cleaner on surfaces including door panels, consoles, and dashboards. For intricate parts and vents, use a detailing brush.
-
Condition Leather: Use a leather conditioner to keep your car's leather seats supple and protected.
8. Maintenance Tips
Keep your car looking great in between detailing appointments.
-
Regular Washes: In essence one has to wash his or her car often to prevent the build up of pollution and dirt.
-
Park in Shade: In order to reduce the probability of being affected by UV rays or oxidation, park your automobile under a shade where possible.
-
Touch Up: That is why it is important to repair small chips and scratches as soon as possible to avoid worsening.
Conclusion
Detailing your car yourself can be both enjoyable and cost-effective. With the right auto detailing supplies and techniques, you can achieve professional-quality results from the comfort of your home. Following a comprehensive car detailing process will ensure your vehicle looks its best, whether preparing for a car show or maintaining its condition.
For those who prefer professional assistance, Jim’s Cleaning NZ offers expert car detailing services. You can trust their team to provide top-notch care and attention to detail, ensuring your car receives the high-quality cleaning it deserves. Visit Jims Cleaning NZ for more information on their services.