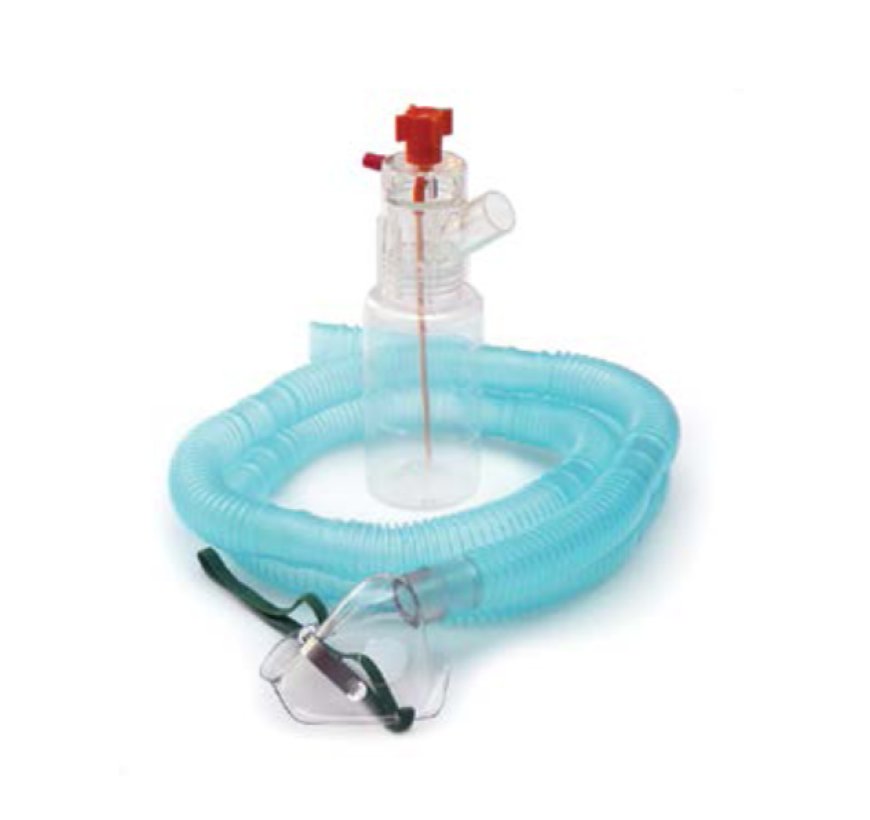
A Home Caregiver's Guide to Cleaning and Maintaining Your Nebulizer
A home caregiver's guide to cleaning and maintaining a Nebulizer, covering daily rinses, weekly disinfection, part replacement, and storage.
 lisaarsonq
A dirty Nebulizer doesn't just fail to help. It actively works against the person using it, aerosolizing whatever bacteria or mold have colonized the medication cup and sending it straight into the lungs with the next treatment. For a home caregiver managing daily respiratory therapy, cleaning isn't a chore layered on top of care. It's part of the treatment itself, as essential to the outcome as the medication in the cup.
Why Cleaning a Nebulizer Isn't Optional Home Care
Moisture sitting inside a medication cup starts becoming a problem faster than most caregivers expect. Bacteria and mold can begin colonizing damp surfaces within 24 hours of a treatment ending, and any organisms growing there don't stay put. The next treatment aerosolizes them directly into the airway, turning a device meant to deliver medicine into a device delivering a respiratory infection risk alongside it.
This risk climbs sharply for certain patients. Immunocompromised individuals, infants, and anyone managing a chronic lung condition have far less margin for a contaminated device than a healthy adult using a Nebulizer occasionally. A five-minute cleaning habit after every treatment is what stands between routine respiratory therapy and a preventable infection working its way into the same lungs the treatment was meant to protect.
What to Rinse After Every Single Treatment
Every treatment session ends the same way: detach the medication cup, mouthpiece, or mask, and the connector piece, then rinse all three under warm water for about 30 seconds. Distilled or sterile water is worth using for this rinse specifically, since tap water in some regions carries mineral content or microorganisms that can leave residue behind in the cup's small crevices.
Once rinsed, shake off excess water and set the parts on a clean towel to air dry completely before the next use, or before reassembling the device for storage. This after-use rinse takes barely any time, and it's the single habit that prevents the far more involved deep-clean that becomes necessary once residue and moisture have had days to build up.
Skip the Dishwasher, Even If It's Tempting
Dishwashers seem like an obvious shortcut for busy caregivers managing multiple daily treatments, but they cause real damage to nebulizer components. High water temperatures warp small plastic pieces, abrasive detergents leave residue lodged in the cup's micro-crevices, and the water jets tend to push grime deeper into seams rather than flushing it out. Parts that look clean coming out of a dishwasher cycle frequently aren't, which defeats the entire purpose of cleaning them in the first place. Hand washing remains the standard for nearly every nebulizer manufacturer's care instructions, and it's worth following that guidance even when a dishwasher feels faster.
The Weekly Nebulizer Disinfection Routine That Actually Kills Mold and Bacteria
Rinsing removes visible residue. It doesn't kill the bacteria and mold that a rinse alone leaves behind, which is why a separate weekly disinfection step exists on top of the after-use routine. Once a week, or more often if anyone in the household is dealing with a respiratory illness, the medication cup, mouthpiece, or mask, and connector need a full soak in a disinfecting solution rather than just a rinse.
Vinegar vs Hydrogen Peroxide vs Alcohol
The most common disinfecting method mixes one part white vinegar with three parts distilled water, submerging the parts fully for 30 to 60 minutes before rinsing thoroughly and air drying. Vinegar works well as a natural, low-cost disinfectant that doesn't leave harsh chemical residue behind. Some caregivers prefer 3% hydrogen peroxide or a 70% isopropyl alcohol soak instead, both of which also kill bacteria and mold effectively, though alcohol soaks typically need a shorter contact time, around five minutes, before rinsing.
Whichever solution gets used, mix a fresh batch every time rather than reusing leftover disinfectant from a previous session, and skip bleach entirely. Harsh chemicals like bleach can degrade the plastic components over repeated use and leave behind residue that gets inhaled during the next treatment, working directly against the goal of the cleaning routine in the first place.
Why Nebulizer Tubing Needs Different Handling Than Every Other Part
Tubing is the one component that breaks the normal cleaning pattern, and treating it the same way as the mask or medication cup actually creates a new problem instead of solving one. Water introduced into the tubing has nowhere to fully drain or dry, since the tube's narrow, enclosed shape traps moisture inside far more easily than a rinsed cup sitting open on a towel. That trapped moisture becomes an ideal breeding ground for mold growing somewhere a caregiver can't easily see or inspect.
Rather than rinsing or soaking the tubing, the standard practice is to leave it dry entirely under normal use and simply reconnect it to the compressor, without the medication cup attached, running air through it for a few minutes if condensation appears. If the tubing shows visible moisture that doesn't clear with this drying method, or if it develops a musty smell or visible discoloration, replacing it outright is the safer move rather than attempting to clean it back to a usable condition.
Nebulizer Drying Technique: The Step Most Caregivers Get Wrong
Every cleaning routine, no matter how thorough the rinse or disinfection step, fails if the drying step gets rushed. Parts need to air dry completely before reassembly or storage, and that means resisting the urge to speed things up with a towel wipe or a hair dryer. Towels and cloths shed fibers that can lodge in the small openings of a medication cup or mask, introducing exactly the kind of foreign material a careful cleaning routine was supposed to eliminate. Heat from a hair dryer can warp or degrade plastic components over repeated exposure, shortening the device's usable lifespan in the process.
Setting parts out in a well-ventilated area speeds up natural air drying without introducing either of these risks. Reassembling or storing a nebulizer while any component is even slightly damp reintroduces the exact moisture problem the entire cleaning process was meant to solve, so patience here pays off far more than any shortcut does.
When to Replace Nebulizer Parts Instead of Cleaning Them
Cleaning extends a Nebulizer's usable life, but it doesn't extend it indefinitely. Most manufacturers recommend replacing the medication cup, mouthpiece, or mask, and tubing roughly every six months under normal use, though tubing specifically may need replacing sooner, sometimes every one to three months, if it shows signs of discoloration or repeated moisture buildup that drying alone doesn't resolve.
A caregiver's regular inspection routine should include a visual check for cracks, tears, or general wear on every component, since damaged plastic can harbor bacteria in ways a standard cleaning routine won't reach and won't fully remove. Air filters deserve their own monthly check as well, since a clogged or discolored filter reduces airflow and compromises how effectively the compressor can aerosolize medication, regardless of how clean the rest of the device stays.
Caring for the Nebulizer Compressor Itself
The compressor unit, the part that actually generates the airflow driving the whole system, follows a completely different care routine than the parts that touch medication directly. It should never be submerged in water or placed anywhere near a wet cleaning process. Instead, wipe the outside down with a damp cloth or a disinfectant wipe on a weekly basis, always with the unit unplugged first.
A well-maintained compressor typically lasts several years, often somewhere in the three-to-five-year range, considerably longer than the smaller parts that need replacing every few months. That longevity depends heavily on keeping the unit dry, checking the air filter on schedule, and avoiding the temptation to run the device with a filter that's visibly discolored or overdue for replacement.
Building a Sustainable Nebulizer Cleaning Routine for Long-Term Caregiving
The caregivers who keep this up consistently over months and years are almost always the ones who've built cleaning into an existing habit rather than treating it as a separate task competing for attention on a busy day. Rinsing immediately after each treatment, before the parts even get set aside, removes the temptation to skip it later. Keeping a small dedicated basin near wherever treatments happen turns the weekly disinfection soak into a two-minute setup rather than a production. B&B Medical Technologies designs its nebulizer product lines with this kind of sustained, everyday caregiver use in mind, favoring components built for repeated cleaning cycles without breaking down long before the compressor itself needs replacing.
A nebulizer that's cleaned properly and consistently doesn't just last longer. It does its actual job better, delivering medication the way it's meant to be delivered rather than delivering whatever's been quietly growing in a damp medication cup since the last treatment.
Frequently Asked Questions
How often should a nebulizer be cleaned?
Rinse all detachable parts after every single treatment, and disinfect them with a vinegar solution or similar disinfectant at least once a week, more often if anyone in the household is currently sick.
Can nebulizer parts go in the dishwasher?
No, unless the manufacturer's manual specifically states the parts are dishwasher-safe. High heat can warp plastic components, and the wash cycle can push residue deeper into small crevices rather than removing it.
Why shouldn't nebulizer tubing be rinsed or soaked?
Tubing's narrow, enclosed shape traps moisture rather than letting it dry, creating conditions for mold growth inside a space that's difficult to inspect. Tubing should be kept dry and replaced if it develops persistent moisture, odor, or discoloration.
How often do nebulizer parts need to be replaced?
Most manufacturers recommend replacing the medication cup, mouthpiece, or mask, and tubing roughly every six months, though tubing may need replacing sooner if it shows signs of wear or repeated moisture buildup.
Is it safe to clean the compressor with water?
No. The compressor should never be submerged or exposed to water directly. Wipe the outside with a damp cloth or disinfectant wipe while the unit is unplugged, and keep its air filter checked and replaced on schedule.