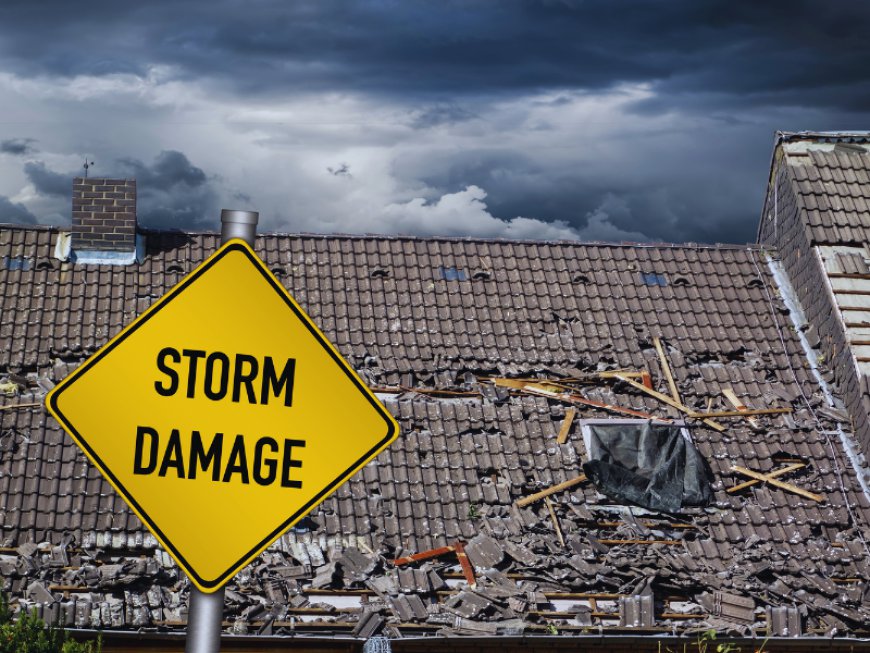
Storm Damage and Your Roof: What San Antonio Homeowners Must Do in the First 48 Hours
Learn what San Antonio homeowners should do in the first 48 hours after storm damage to their roof. Follow these critical steps to prevent further damage, protect your home, and streamline insurance claims.
 goalcreator4
When a powerful storm rolls through San Antonio — bringing hail, high winds, and driving rain — the damage it leaves behind isn't always immediately obvious. Unlike a broken window or a fallen fence, roof damage can be subtle, hidden, and quietly worsening with every passing day. What you do in the first 48 hours after a storm can make the difference between a straightforward insurance claim and a costly, drawn-out repair project.
This guide walks you through exactly what steps to take immediately after storm damage to protect your home, preserve your insurance rights, and get your roof properly repaired without unnecessary delays.
Step 1: Prioritize Safety First
Before you set foot outside or attempt any kind of inspection, make sure it's safe to do so. After a major storm, live power lines may be down, trees may be unstable, and debris can shift unexpectedly. Wait until conditions are fully clear and daylight is available before attempting any walkthrough of your property.
Never climb onto a roof without proper equipment and experience. Even a roof that appears undamaged can become dangerously slippery when wet or covered with debris. Leave the roof-level inspection to a licensed roofing professional.
Step 2: Document Everything Before Touching Anything
Once it's safe, your first priority should be thorough documentation. Use your smartphone to photograph and video every inch of your property — the yard, the exterior walls, the gutters, the driveway, and the roof as viewed from the ground. Capture any visible damage from multiple angles and in good lighting.
Inside your home, check every room for signs of water intrusion: wet spots on ceilings, discoloration on walls, damp areas around windows and skylights. Photograph all of these as well. This documentation will be critical when filing your insurance claim.
Do not throw away or move any debris or damaged materials before your insurance adjuster has had a chance to see them. Even a pile of shingle granules in your gutters can serve as evidence of the extent of the storm's impact.
Step 3: Prevent Further Damage with Temporary Measures
Your insurance policy likely requires you to take reasonable steps to prevent additional damage after a storm event. If your roof has visible holes, gaps, or sections of missing shingles, tarping those areas is a responsible and often necessary step.
However, this should only be done if it can be accomplished safely from ground level or with a secure ladder by someone experienced with such work. Lay tarps over damaged areas and secure them firmly so they don't blow off in subsequent wind. Keep all receipts for any materials you purchase for temporary protection — these costs are typically reimbursable under your homeowner's insurance policy.
Step 4: Contact Your Insurance Company
Don't delay notifying your insurance company. Most policies have specific windows within which you must report storm damage to be eligible for coverage. Call your insurer or file online as soon as possible after the storm.
Be prepared to provide your documentation — photos, videos, and any notes about what you observed. Ask your insurer about the claims process, timeline, and whether they will send an adjuster or require you to get contractor estimates first. Understanding the process upfront will help you avoid miscommunication down the line.
Step 5: Hire a Reputable Local Roofing Contractor
This step is where many homeowners make a costly mistake. In the wake of a major storm, storm-chasing contractors flood affected neighborhoods, going door to door offering quick fixes and unrealistically low bids. Many of these companies are unlicensed, uninsured, and will be long gone if their work fails months later.
Instead, seek out a locally established, licensed roofing contractor with a documented history in your community. A reputable contractor will offer a free inspection, provide a clear and itemized written estimate, and be willing to work directly with your insurance company throughout the claims process.
Look for contractors who are members of recognized industry associations, carry liability insurance and worker's compensation coverage, and have verifiable reviews from local homeowners.
Step 6: Get a Professional Roof Inspection
Even if your roof looks intact from the ground, a professional inspection is essential after any significant storm. Hail damage in particular is notoriously difficult to detect without getting on the roof and closely examining the shingles. Impact marks can be subtle, but they compromise the integrity of the shingle's protective coating and lead to premature deterioration.
A qualified roofing inspector will examine every component of your roof system — shingles, underlayment, flashing, gutters, decking, and ridge caps — and provide you with a written report detailing any damage found. This report is valuable both for your insurance claim and for understanding what repairs are needed.
What Hail Damage Actually Looks Like
Many homeowners expect hail damage to be dramatic and obvious, but it often isn't. On asphalt shingles, hail typically creates circular bruise marks or impact craters that may be dark or shiny compared to the surrounding surface. You might feel a soft spot when pressing on the affected area, indicating that the granules and mat beneath have been compromised.
On soft metal components like vents, flashing, and gutters, hail leaves behind dents that are often round and uniformly distributed. These are easy to identify and serve as clear indicators that shingles were also impacted.
Wind damage typically shows up as lifted, curled, or missing shingles, as well as debris from nearby trees. In some cases, wind can remove entire sections of a roof in a single event.
Understanding Your Insurance Coverage
Homeowner's insurance generally covers sudden and accidental damage, which includes storm damage from hail, wind, and lightning. However, policies vary significantly in their coverage details, deductibles, and exclusions. Some policies cover the replacement cost value of your roof (what it would cost to replace it today), while others cover only the actual cash value (depreciated cost).
It's worth reviewing your policy annually so you're not surprised at claim time. If you're unsure about your coverage, your insurance agent can walk you through the details before any damage occurs.
Conclusion
The 48 hours following a storm are critical. By acting quickly, documenting thoroughly, protecting your home from further damage, and partnering with a qualified local roofing professional, you give yourself the best possible outcome — both in terms of repairs and insurance recovery.
San Antonio homeowners who experience storm damage deserve fast, honest, and professional service from contractors who know the local climate and the claims process inside and out.
For emergency storm damage inspections and professional roof repair in San Antonio and the surrounding areas, visit: https://sotexexteriors.com