How to Paint Your Ceiling Without the Mess: A Complete Guide to a Smooth, Professional Finish
Painting a ceiling is one of those home improvement projects that many homeowners put off because they expect dripping paint, sore arms, and a long cleanup process. While ceilings can be challenging, the right preparation and techniques can make the job far easier than most people imagine. Whether you're refreshing a single room or updating your entire home, learning how to paint a ceiling properly can save time, reduce frustration, and deliver impressive results.
Many homeowners planning larger renovation projects often work with Residential Remodeling Contractors Southampton to coordinate painting with other upgrades, but if you're tackling the project yourself, a little planning can go a long way toward achieving a clean, polished finish.
Why Ceiling Painting Gets So Messy
Before picking up a roller, it's helpful to understand why ceiling painting often becomes a frustrating experience.
Gravity naturally works against you, making paint more likely to drip or splatter. Using too much paint on the roller, rushing through the job, or skipping preparation can quickly turn a simple project into hours of extra cleanup.
Fortunately, most common ceiling painting problems are completely avoidable with proper techniques and quality tools.
Gather the Right Supplies Before You Start
Having everything ready before opening the paint can help keep the project organized and efficient.
You'll typically need:
- Ceiling paint with a flat or matte finish
- High-quality roller and extension pole
- Appropriate roller nap for your ceiling texture
- Angled paintbrush for cutting in
- Painter's tape
- Canvas drops cloths
- Paint tray and liner
- Ladder
- Safety glasses
- Damp cloth for quick cleanup
Investing in quality painting tools often produces smoother results while reducing splatter.
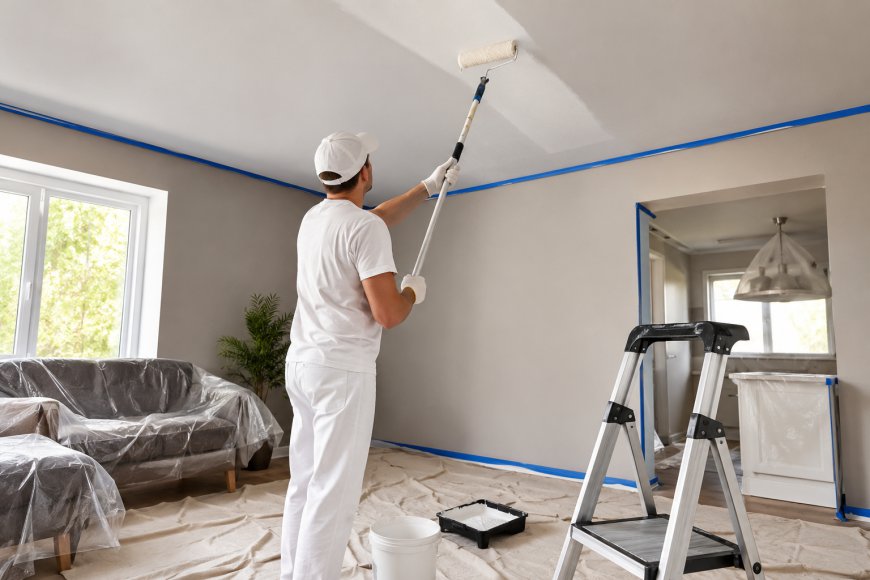
Prepare the Room Carefully
Preparation is the biggest factor in keeping your project clean.
Remove or Cover Furniture
Move as much furniture as possible out of the room. Anything remaining should be completely covered with durable drop cloths rather than thin plastic sheets, which can shift during painting.
Protect Floors
Canvas drops cloths provide better grips than plastic and absorb accidental drips without creating slippery surfaces.
Tape Trim and Fixtures
Apply painter's tape around ceiling fans, light fixtures, crown molding, vents, and the tops of walls to create crisp edges while protecting finished surfaces.
Clean the Ceiling Before Painting
A surprising number of people skip this step.
Dust, cobwebs, grease, and smoke residue can prevent paint from bonding properly. Even ceilings that appear clean often have a thin layer of dust that affects the final finish.
Use a microfiber mop or soft cloth to remove dust. For kitchens or bathrooms, gently clean greasy areas with mild soap and water, allowing everything to dry completely before painting.
Choose the Right Paint Finish
Flat ceiling paint remains the most popular choice because it hides imperfections, roller marks, and uneven textures exceptionally well.
In areas with higher humidity, such as bathrooms or laundry rooms, a moisture-resistant matte finish may provide better long-term durability while still maintaining a clean appearance.
Selecting quality paint can also reduce the number of coats required, saving both time and effort.
Pick the Correct Roller Nap
Different ceiling textures require different roller covers.
Smooth Ceilings
Use a shorter nap roller to create an even finish with minimal stipple.
Lightly Textured Ceilings
A medium nap roller provides enough coverage while maintaining good control.
Heavy Textured Ceilings
Longer nap rollers reach deeper into textured surfaces and reduce missed spots.
Matching the roller to the ceiling texture makes painting more efficient and significantly reduces the need for touch-ups.
Cut In Before Rolling
Professional-looking results begin with clean edges.
Using an angled brush, paint a narrow border around the room where the ceiling meets the walls. Also paint carefully around light fixtures, vents, and other obstacles.
Working in manageable sections helps maintain a consistent finish once you begin rolling.
Avoid Overloading the Roller
One of the biggest mistakes beginners make is applying too much paint to the roller.
Instead of soaking it completely, load the roller evenly and roll off excess paint using the tray's ridged surface.
A properly loaded roller should feel saturated but never dripping. This simple habit dramatically reduces splatter while giving you better control.
Use the Right Rolling Technique
Once you've finished cutting in, begin rolling immediately while the edges remain wet.
Work in small sections and roll slowly using consistent pressure. Avoid pushing down too hard, as this often creates streaks and uneven coverage.
Slightly overlap each pass to maintain a wet edge and eliminate visible lap marks.
Rather than rushing to finish one side of the room, complete each section methodically before moving on.
Let Each Coat Dry Completely
Patience is essential for a flawless finish.
Even if the ceiling appears dry, applying another coat too soon may pull partially cured paint away from the surface, resulting in uneven coverage.
Always follow the manufacturer's recommended drying time and inspect the ceiling under different lighting before deciding whether another coat is necessary.
Common Mistakes to Avoid
Even experienced DIY painters occasionally run into avoidable problems.
Some of the most common mistakes include:
- Skipping surface preparation
- Using inexpensive rollers that shed lint
- Painting over dirty ceilings
- Applying thick coats instead of multiple thin ones
- Ignoring room ventilation
- Stopping in the middle of a section
- Failing to maintain a wet edge
Avoiding these mistakes will improve both the appearance and longevity of your finished ceiling.
When Professional Help Makes Sense
While many homeowners enjoy DIY painting, larger properties, vaulted ceilings, commercial spaces, or extensive renovations often require specialized equipment and experienced painters.
Businesses, offices, retail stores, and industrial facilities frequently rely on Commercial Painting Service Long Island providers to complete ceiling projects efficiently while minimizing disruptions to daily operations.
Professional painters also understand how to handle different ceiling materials, textures, and challenging architectural features that may be difficult for homeowners to manage safely.
Final Cleanup Tips
Once the paint has fully dried, carefully remove painter's tape at a slight angle to avoid peeling fresh paint.
Clean brushes and rollers immediately if using water-based paint and properly dispose of used materials according to local guidelines.
Inspect the ceiling from multiple angles with both natural and artificial lighting to identify any small areas requiring touch-ups.
Taking a few extra minutes during cleanup helps preserve your tools and leaves the room looking fresh and complete.
Conclusion
Painting a ceiling doesn't have to involve endless drips, splatters, or frustrating cleanup. With thoughtful preparation, quality materials, and steady techniques, even first-time painters can achieve smooth, professional-looking results. From protecting your space and selecting the right roller to maintaining a wet edge and allowing proper drying time, every step contributes to a cleaner, more attractive finish.
If your project extends beyond a single room or includes multiple surfaces that require expert attention, working with experienced Professional Painting Services Long Island professionals can help ensure beautiful, long-lasting results while saving valuable time and effort. Whether you choose the DIY route or hire experts, careful planning is the key to a ceiling that enhances the entire room.