How Competitive Gamers Use a Free Online Gamepad Tester to Remove Every Hardware Variable Before They Play
Stick drift, bad triggers, and missed buttons cost you matches. Run a free gamepad tester in your browser to find and fix every controller problem before you play.
Competitive gamers obsess over settings. They fine-tune sensitivity, adjust deadzone values, test different controller grips, and spend hours optimizing every software variable in their setup. Then they plug in a controller they have never objectively tested and assume it performs exactly as intended.
That assumption costs matches.
A controller with 0.07 drift on the right thumbstick fights your aim every single second you play. A trigger that jumps in value at 40 percent of its travel range fires at inconsistent pressure points. A button that misses 3 percent of inputs drops key presses during the moments that matter most.
None of these problems announce themselves clearly. They hide inside the noise of normal gameplay, blamed on lag, bad luck, or off days. A free online gamepad tester surfaces them in seconds with objective hardware data.
This guide covers how competitive and casual gamers alike use Gamepad Tester to remove controller uncertainty from their setup completely.
What a Free Online Gamepad Tester Actually Measures
Most gamers have never seen the raw data their controller produces. Every game they play processes, filters, and transforms that data before acting on it. The controller hardware becomes invisible behind layers of software.
A free online gamepad tester makes the hardware visible again. It uses the Web Gamepad API, a standard built into every modern browser, to read raw input data directly from any connected controller. The data travels from the controller through the operating system input layer to the browser with no application modifying it along the way.
What you see on screen is what your hardware produces. That is the entire value of the tool.
Thumbstick Axis Values
Both thumbsticks report two axes. The left stick reports X for horizontal and Y for vertical. The right stick reports the same. Values range from 1.0 at one extreme to 1.0 at the other, with 0.00 representing a perfect neutral center.
When you release both thumbsticks completely, and the axis values settle to 0.00, your sticks are producing accurate hardware output at rest. When they settle to 0.04, 0.07, or 0.12, your hardware has drift,d and every moment of gameplay is fighting that offset.
Analog Trigger Values
L2 and R2 on PlayStation, LT and RT on Xbox, and ZL and ZR on Nintendo Switch Pro all report values from 0.0 at rest to 1.0 at full press. The tester shows you a live numerical value and a visual bar for each trigger. A slow, controlled pull from rest to full press reveals the entire health profile of the trigger mechanism in one motion.
Button States
Every button on the controller lights up on press and clears on release with no perceptible delay. A button that fails to light up on any press confirms a hardware contact failure at the component level. This confirmation is independent of any game, cable, platform, or software variable.
Controller Information
The tester displays the device name, total button count, and total axis count as the browser reports them. This tells you which input mode the controller is operating in and helps identify any unexpected mapping variations between browsers or driver configurations.
Setting Up Each Controller Platform
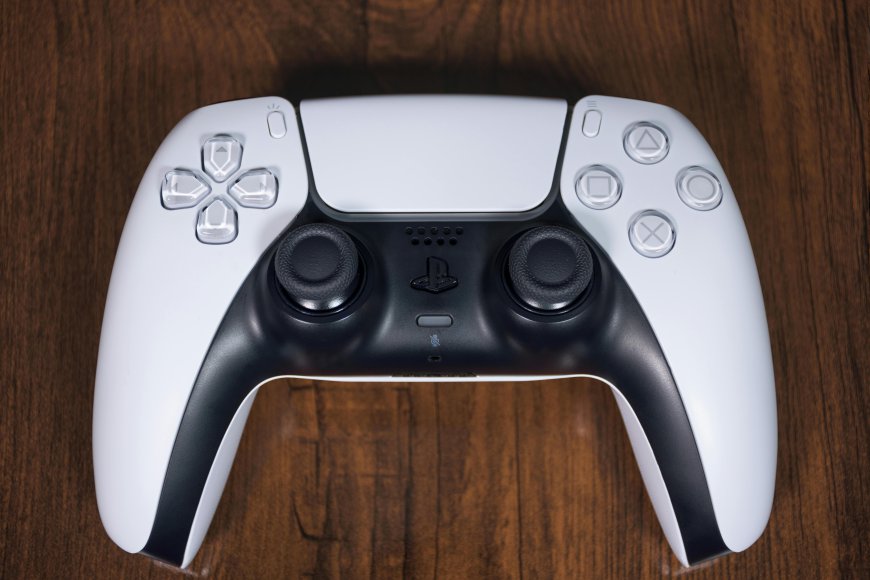
PS5 DualSense
Connect the USB-C cable. Windows, macOS, and Linux recognize the DualSense instantly without any driver. For Bluetooth, hold the PS button and Create button together until the light bar flashes, then pair through system Bluetooth settings. USB provides lower and more consistent polling latency and is the recommended connection for both testing and competitive play.
PS4 DualShock 4
Connect via Micro USB data cable. Windows and macOS recognize it immediately. For Bluetooth, hold the PS button and Share button until the light bar flashes, then pair through system Bluetooth. Some Windows setups benefit from running DS4Windows alongside the browser for enhanced input handling, though the tester works without it for diagnostic purposes.
PS3 DualShock 3
The DualShock 3 needs a driver on Windows because it uses an older proprietary protocol. DsHidMini is the most widely maintained current option. Install it first, connect via Micro USB, and confirm Device Manager shows the device before opening the browser. macOS and most Linux distributions recognize the DualShock 3 natively without any extra driver.
Xbox One, Xbox Series X, and Xbox Series S
Connect the Xbox One via Micro USB and the Xbox Series via USB-C. Windows recognizes both immediately through the built-in XInput driver. For wireless, hold the pairing button on top until the Xbox logo flashes, then pair through Bluetooth or use an Xbox Wireless Adapter. The XInput path provides the most reliable browser detection for Xbox controllers.
Nintendo Switch Pro Controller
Connect via USB-C cable. Windows, macOS, and Linux all recognize it as a standard HID gamepad without drivers over USB. Bluetooth pairing is available on all platforms. USB provides more consistent detection across all browsers and is the recommended first choice for testing.
Activating the Connection
Open progamepadtester.com in Chrome, Edge, or Firefox. Press any button on the controller once after the page loads. This satisfies the browser security requirement for an initial deliberate input gesture. All buttons, axes, and triggers go live immediately after that first press.
The Pre-Session Controller Check
Competitive players benefit most from running a quick controller check before every important session. The full check takes under three minutes and confirms your hardware is performing correctly before a single match begins.
Check One: Resting Axis Measurement
Place the controller on a flat surface and remove all contact, including your palms,s on the grips. Watch all four thumbstick axis values for 15 seconds without touching anything.
0.00 to 0.02 on all axes means your sticks are healthy. Manufacturing tolerance and electrical noise account for values in this range.
0.03 to 0.04 on any axis means early potentiometer wear is present and measurable. Games with standard deadzones hide this currently. Monitor it over time.
0.05 to 0.09 on any axis means active drift that competitive titles with tight deadzones will register as unintended movement. Address this before playing at a competitive level.
0.10 and above means significant drifis t visible in most games. The controller needs repair before competitive use.
Check Two: Trigger Sweep
Pull each trigger slowly from rest to full press over five seconds while watching the value in the tester. Release slowly and watch the return to 0.0.
A healthy trigger shows a smooth, unbroken rise from 0.0 to 1.0 and a clean return to 0.0 on release. Any flat spot, value jump, or stuck return above zero confirms a problem in the trigger mechanism.
Check Three: Button Tap Test
Press every button you use during gameplay and confirm clean registration in the tester. For any button that feels inconsistent, press it 30 times quickly and count registrations versus presses. Any missed presses confirm a hardware contact failure.
The Drift Problem Across Every Platform
Stick drift is the most common hardware failure in consumer controllers, regardless of platform. Understanding why it happens helps you interpret your test results correctly.
Every analog thumbstick uses a potentiometer: a resistive track with a sliding wiper that moves as the stick tilts. At the neutral center, the wiper sits at the midpoint of the track and produces 0.00. The center region of the track accumulates more friction than anywhere else because the stick returns there after every input. Over thousands of hours of use, the track material at that center point wears down. The wiper can no longer produce a true center reading at mechanical neutral, and the output value shifts permanently away from zero.
PS5 DualSense Drift
The DualSense generated significant attention for drift, appearing earlier in the product lifecycle than users expected. Sony extended warranty coverage in multiple regions. Repair community analysis pointed to the potentiometer track material and module design as contributing factors to accelerated wear in early production units. Left stick drift appears first in most cases because character movement input dominates left stick usage across almost every game genre.
PS4 DualShock 4 Drift
The DualShock 4 has a usage history extending across nearly a decade. Left stick drift is the most reported failure pattern for the same movement input reasons as the DualSense. The repair community for this controller is the largest and most documented of any PlayStation model, with comprehensive guides and widely available, inexpensive replacement modules.
PS3 DualShock 3 Drift
Controllers from the PS3 generation carry years of accumulated use. Stick drift occurs in heavily used units,s but aging button contacts are an equally common issue. The rubber dome switches behind the face buttons oxidize over time and produce intermittent registration failures. Always test both sticks and all buttons thoroughly when evaluating a DualShock 3.
Xbox Controller Drift
Xbox One attracted criticism for bumper mechanism failures alongside stick drift. The Xbox Elite Series 2 received complaints about early thumbstick wear relative to its premium price. Xbox Series controllers improved module quality but follow the same fundamental potentiometer wear pattern. Right stick drift appears at rates approaching left stick drift in controllers used heavily for first-person shooters because aiming input generates comparable wiper travel on the right axis.
Nintendo Switch Pro Controller Drift
The Switch Pro Controller uses a thumbstick design that follows the same potentiometer wear pattern as every other modern controller. Left stick drift appears more frequently in heavily used units from character movement input accumulation. The tester identifies it using exactly the same resting axis measurement as any other platform.
Using Test Data for Precise Deadzone Configuration
The most direct competitive benefit of a gamepad tester is the ability to configure your deadzones based on actual measured hardware data instead of generic default values.
The Problem With Default Deadzones
Game developers set default deadzone values conservatively to cover the worst-case scenario across all controllers at any stage of wear. A game might default to a 0.12 inner deadzone. That setting means the first 12 percent of stick travel on every axis registers as zero output regardless of whether your specific controller actually needs that much filtering.
A brand new DualSense with resting axis values of 0.01 on all four axes could safely operate at a 0.02 deadzone. Running it at 0.12 discards 10 percent of usable stick precision that your hardware is perfectly capable of delivering.
The Calculation
After the drift test, note the largest resting value across all four axes. Add 0.01 as a safety buffer. Use that number as your inner deadzone.
A controller with a maximum resting value of 0.03 runs safely at a 0.04 deadzone. The difference between 0.04 and a typical 0.12 default represents 8 percent of additional usable stick travel at the center of the movement range, where fine control matters most.
Applying the Value
Steam Input handles per-game deadzone configuration for PS5, PS4, Xbox, and Nintendo controllers. Right-click any game in Steam, open Properties, and access Controller settings to apply your calculated value.
DS4Windows accepts precise deadzone values in the Analog Sticks section of each profile. Enter the exact number the tester gave you rather than estimating with a slider.
RewASD supports per-axis deadzone entry across all platforms. You can set different values for X and Y independently on each stick, which produces better results when one axis drifts more than the other.
Diagnosing Trigger Problems in Detail
Triggers affect competitive play more than most gamers realize. Variable trigger pressure matters in racing games for acceleration control, in shooters for the distinction between aim and fire, and in fighting games that use partial trigger inputs for special moves.
The Dead Spot Problem
A dead spot in a trigger means pressing it further produces no additional output value across a portion of the travel range. The value sits flat until the wiper passes the worn section of track. A shooter player pulling a trigger to a consistent pressure point will sometimes fire and sometimes not, depending on which side of the dead spot their pressure lands on.
The Jump Problem
A trigger that jumps in value snaps past a range of values instantly during a slow pull. A player trying to hold a trigger at 40 percent pressure for partial acceleration finds the trigger jumps from 30 percent to 55 percent with no stable point in between. Racing consistency disappears.
The Stuck Return Problem
A trigger that does not return fully to 0.0 maintains a small residual value at full release. This can cause unintended partial activation of trigger-dependent actions in games that read trigger values continuously rather than only on deliberate press.
DualSense Adaptive Trigger Consideration
The DualSense adaptive trigger actuators create variable physical resistance in PS5 games through electromagnetic mechanisms. The Web Gamepad API reads the potentiometer value only. A malfunctioning actuator can physically bind the trigger paddle and produce irregular potentiometer readings even with an intact potentiometer. If the tester shows unusual trigger values and the trigger also feels physically stiff without any active game effect, the actuator mechanism needs separate physical inspection.
What to Do After Each Test Result
Drift at 0.03 to 0.04
Apply electronic contact cleaner to the base of the affected thumbstick. This removes oxidation and debris from the potentiometer track and sometimes restores clean resting values at this early stage. Increase your configured deadzone slightly as a temporary measure. Retest in 30 days and compare values to the current reading.
Drift at 0.05 to 0.09
Contact cleaner is worth one attempt. If values do not return below 0.04 after cleaning, order a replacement thumbstick module. For PS5 DualSense and PS4 DualShock 4, Hall effect replacement modules that use magnetic sensing instead of resistive tracks are available and permanently eliminate recurring drift. File a warranty claim if the controller is within the coverage period. The specific axis values from the tester serve as objective evidence.
Drift at 0.10 and Above
Proceed directly to thumbstick module replacement. Contact cleaner provides temporary and partial improvement at best at this severity level. Hall effect modules are the recommended replacement option for PS5 and PS4 controllers used for competitive play.
Trigger Irregularities Confirmed
Trigger potentiometer replacement resolves dead spots, value jumps, and stuck returns caused by track wear. Replacement trigger assemblies are available for all five platforms. For the DualSense, evaluate whether the adaptive trigger actuator also needs attention if physical binding was part of the observed behavior.
Button Failure Confirmed
Clean the contact pad beneath the button with isopropyl alcohol. This resolves most intermittent contact failures caused by oxidation. Persistent failures after cleaning require the membrane or switch beneath that button to be replaced. For PS3 DualShock 3 controllers, rubber dome contact sheet replacement is a common and inexpensive repair that restores multiple buttons at once.
Testing Controllers Before and After Repair
A free online gamepad tester is an essential part of any controller repair workflow.
Before Repair
Run the full three-check test and document every result. Record all four resting axis values, note which buttons missed presses and by how many, and describe any trigger curve irregularities. This baseline tells you exactly what the repair needs to accomplish.
During Repair
Connect the partially reassembled controller via USB before closing the shell. Confirm each repaired component works correctly while you still have access to the internals. Catching a problem at this stage saves you from disassembling the controller a second time.
After Repair
Run the full test again and compare every result against your pre-repair baseline. A successful thumbstick module replacement returns resting axis values to the 0.00 to 0.02 range. A successful trigger potentiometer replacement shows a smooth, unbroken curve from 0.0 to 1.0. A successful button repair produces clean registration on every press across 30 rapid taps.
Frequently Asked Questions
Does this tool cost anything?
No. Every feature is available immediately with no account, no subscription, and no usage limit. The tool is 100 percent free.
Does the tool collect any data from my controller?
No. All processing happens locally in the browser. No axis values, button states, trigger readings, or device information are sent anywhere.
Can I test more than one controller at the same time?
Yes. The Web Gamepad API supports multiple simultaneous controllers. Connect a PS5 DualSense and a Nintendo Switch Pro Controller at the same time,e and the tester displays both.
My Nintendo Switch Pro Controller shows unexpected axis mappings in the tester. What does that mean?
Some browsers map Switch Pro Controller axes through a standard HID interpretation that differs from Nintendo's official layout. The tester shows you the exact axis index and value for every input as your browser reports it. Use those specific indices when configuring any input remapping tool on PC.
How do I know if my drift is getting worse over time?
Run the resting axis test on the first of every month and record the four values alongside the date. A value that holds steady confirms stable hardware. A value that increases by 0.01 or 0.02 each month shows you the rate of degradation and gives you a clear timeline for planning a repair.
Does the tester work on Chromebooks?
Yes. Chromebooks run Chrome natively and provide full Web Gamepad API support. Most USB HID controllers, rs including PS4, PS5, Xbox, and Nintendo Switch Pro, connect and work immediately.
Summary
A free online gamepad tester removes every hardware variable from your gaming setup by showing you exactly what your controller produces at the hardware level. Whether you own a PS5 DualSense, PS4 DualShock 4, PS3 DualShock 3, Xbox controller, or Nintendo Switch Pro Controller, the same browser-based tool reads the same raw input data and displays it instantly with no cost, no download, and no account.
You confirm your sticks are clean before a competitive session. You catch drift at 0.03 before it becomes 0.15. You verify your triggers respond linearly across their full range. You confirm every button registers reliably under rapid input. You configure the tightest safe deadzone your hardware can support.
Every one of those actions removes uncertainty from your setup and replaces it with data. Connect your controller, press one button, and know exactly what your hardware is doing.